Tag Archive for: Beekeeping Equipment

When To Add A Super To A Beehive

For both new beekeepers and experienced beekeepers alike, it can often be difficult to know when it is the right time to add an additional box (known as a super) to a growing colony of bees.  Unfortunately, there is often no perfect answer to this question.  Here at Wildflower Meadows, with all the combined years of experience of our team, we still find ourselves at certain times wondering and debating whether it is the right decision to add supers to our colonies or not.

It might seem at first that a beehive is always better off with more space.  Afterall, more space means more room for surplus honey, more room for a colony to expand, more room for the bees to avoid crowding, and more room to reduce swarming pressure.  So, why not just add a super or two and solve all these problems at once?  Beginning beekeepers typically follow this perfectly logical train of thought.  The results, however, are often not what they had in mind.  Too much space for a beehive can often lead to unintended consequences.

There are several downsides to providing too much space to a colony, the main one being that rather than promoting growth, adding overly excessive space to a beehive, or adding space at the wrong time can often set a colony backward.  In fact, adding a super at the wrong time of year can sometimes result in a smaller or more stressed out colony than if the colony had simply been left alone.  This is a counterintuitive concept, and it is what causes experienced beekeepers to pause and think twice before supering their colonies, especially relatively weak ones.

Anytime a super is added to a colony, it affects the bees’ ability to regulate the temperature and humidity balance of the colony.  It gives them more space to attend to, clean up, maintain, and defend, all potentially straining their resources.  During cold weather, cavernous space in a beehive is especially a liability, causing detrimental heat loss.  Even in very hot weather, excess space can interfere with a colony’s ability to cool the all-important colony core and brood nest.

Also, bees naturally like to move upward.  When a super is added prematurely, the bees will tend to move upward first, rather than outward.  This sometimes results in a long and narrow shape to the colony, which is less than ideal both for the efficient use of the equipment, and for maximizing colony growth and honey production.

So, when is the best time to add a super to a colony of honeybees?  The ideal time to add a super is during periods of natural population growth (typically, the spring), before or during a honey flow (spring or summer), or during periods of swarming (again, typically the spring).  Before adding a super, beekeepers often use a standard rule of thumb, which is known as the 7/10 rule.  This rule says that the proper time to add a super to a beehive is when the bees have already covered 7 of the 10 frames in the existing box or boxes.  If the colony is growing and the timing is right (as noted above) then the 7/10 rule comes into play.  If the colony is strong enough to have 7 of the 10 frames full of bees, then is has the necessary ingredients for a natural and seamless expansion into a new empty super.

Bee Space

Honeybees are curious creatures that live in world of standardized precision.  No matter the race of honeybee, or location in which they reside, their individual honeycomb cells are all constructed in a standard hexagonal shape, an approximate 5.2mm dimension, that is the same the world over.  Their dance and communication methods are also universal across the entire species.  What’s even more astonishing, is that the space that they inhabit between their honeycombs is universally standardized and completely precise, regardless of any other characteristics of the hive or of the bees themselves.

This space between honeycombs is called bee space.  Bee space needs to be larger than 4.5mm and less than 9.0mm – no matter what!  Honeybees, being creatures of precision, will not tolerate any space outside of this range.  If the space between combs gets too close (less than 4.5mm) the bees will close the gap, usually sealing it with propolis.  But if the gap becomes too wide (greater than 9mm), the bees will build additional honeycomb to bring the gap back to the acceptable and precise space that they desire.

As experienced beekeepers, this concept of bee space seems obvious and intuitive to us.  We know that if we leave too much of a gap between the frames of our hives, our bees will quickly fill this gap with beeswax, a mess of what we call “burr comb.”  This burr comb is actually just the bees’ natural drive to bring their bee space back to precision.

While this concept of bee space seems so obvious to us today, it is hard to believe that this was not always the case.  It was L.L. Langstroth, the “Father of American Beekeeping,” who, back in 1852, intuited this hypothesis.  After he realized this concept, he took his thinking one step further with the question, “what if he could design a beehive that had the perfect bee space in all directions?”  This led to the standardized, square hive body that has become the backbone to America’s – and the world’s – beekeeping profession.  We call our hive bodies “Langstroth hives,” because they were invented by Langstroth to take into account the perfect bee space.

Every space in a modern hive is more or less standardized to accommodate bee space.  We may not realize it, but what keeps our bees from connecting the tops of the frames to the lid of the beehive is the bee space that is built into the construction of the hive body.  All modern hive body boxes are also designed so that the frames hang about 8mm short of the bottom of the box.  This bee space gap is the perfect bee space that enables us beekeepers to remove or pry open a hive box with few consequences; such as easily removing lids, bottoms, and frames, all without disrupting the construction of the hive.  In addition, the edges of the side combs always sit about 8mm from the inside of the wooden box, and the tops of each frame hang about 8mm from the top of the box.  In fact, our Langstroth bee boxes are a marvel of precision, with bee space taken into account in all aspects of the construction.

Of course, it really is the bees themselves that drive us humans to this level of precision, as they will not tolerate inconsistency and imprecision.  They are world-class engineers, and demand the very same from us beekeepers!

Unwelcome Guest

As the beekeeping year winds down and the nights become long and cold, honeybees tend to huddle into winter clusters, hunkering down for the icy cold months ahead.  These winter bees gather into a tight unit, preserving their heat and honey.  They become less active, as their goal is not to expand or make honey, but rather simply to survive.  They are perfectly happy to stay inside their comfortable home, keep warm, and ride out the winter.

Sometimes this warm and comfortable home, however, attracts unwanted guests.  The life of a mouse during winter is not particularly easy either, as a mouse is always on the lookout for both shelter and warmth.  And nothing quite beats the comfort of hanging out inside of a beehive while the bees are hard at work keeping it warm.  Not only is a beehive sheltered and warm, but it also contains free food in the form of pollen and honey.  Believe it or not, usually during winter, a mouse can actually take up residence in a live beehive and live perfectly well alongside the bees!

During most of the season it would be impossible for a mouse to coexist within a live bee colony.  The population of bees is simply too high and too active in the peak of the season for a mouse to survive for too long without being stung.  A summer colony is booming with activity and plenty of guard beesWinter colonies, however, are small and inactive, thus making them perfect targets for opportunistic mice.

Once inside a colony, a mouse can not only chew through valuable food stores, but also cause damage to the honeycomb, and contaminate the combs and woodenware with urine.  From both the bees’ and the beekeepers’ perspective, mice really are unwanted guests.

Lets be honest though, the little guy in the above picture looks perfectly innocent.  You might even think that he deserves a nice home.  But sorry, Mr. Mouse, the bees and the beekeeper tend to disagree.

Our Smallest Domestic Animal

Humans seem to have always been motivated by honey.  The first recorded use of honey dates all the way back to around 25,000 years ago.  But this timeframe only refers to when humans began documenting the collection of honey – in cave art.  Considering that many other animals, such as bears, collect honey without drawing pictures of it, it is likely that humans were collecting honey well before they began recording their feats in artwork.  The first humans to begin consuming honey no doubt sought out wild hives and robbed their honey in the same way that many people still do today – mainly by smoking the hives, and perhaps by wearing protective gear to grab the juicy honeycombs that bees use to store honey.

If you were someone who had to search out wild hives in order to obtain honey, the advantages of domesticating honeybees would quickly become obvious.  Having your own domestic honeybee hive would mean that you would not have to go searching for honey, and you could gain some control over the timing and availability of the honey harvest.

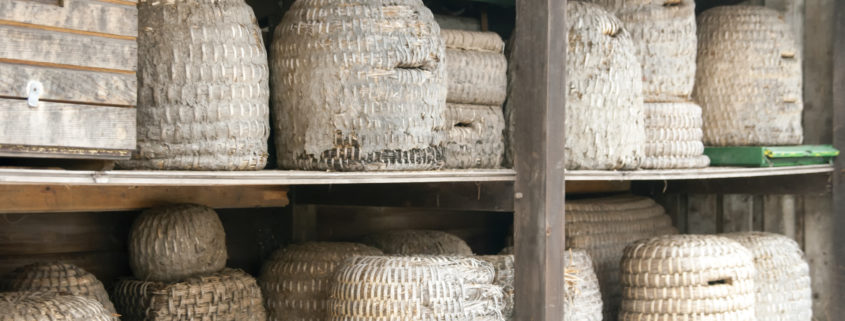
The earliest records of domesticated beekeeping date back to around 7000 BC.  The first beekeepers appear to have kept hives of bees in clay pots.  We know this because traces of beeswax have been found in certain pots from this era in the Middle East.  As we currently know, bees do not have to be kept in any specific kind of container.  Beekeepers can establish bees in all sorts of shelter – hollowed out logs, trees, boxes, baskets, etc.  Many early beekeepers soon switched to what we call “skeps” to house their bees.  Skeps are beehives that are more or less baskets of bees.

For the most part, compared to many other domesticated animals, bees have fared mostly well in their relationship with their human caretakers.  Unlike nearly all domestic animals, individual bees are not corralled, and are free to leave and return at will.  Today, with the invention of the Langstroth hive, with its removable and replaceable frames, if a beekeeper is responsible and conscientious, the bees can live indefinitely.

Once honeybees became domesticated, the practice of beekeeping began.  Bee breeding also began, with the selection criteria of gentleness and honey production generally taking the forefront.  With domestication, humans began their close relationship and husbandry of the smallest domestic animal to date – the tiny and intrepid honeybee!

The Solar Wax Melter

Over the course of a beekeeping season, you may find yourself collecting scraps of beeswax and not knowing what to do with them.  For example, when you scrape away burr comb or lids, or when you scrape away honey cappings during your honey harvest, you will collect perfectly good beeswax.  For a small-scale beekeeper this is not going to be a huge amount of wax and hardly worth the time.  Let’s face it, you probably are not going to be able to start a Fortune 500 candle company with your meager wax scrapings.  However, if you save up enough wax, little by little, over the course of a year you should have eventually gathered enough wax by the end of the year for a few wonderfully scented beeswax candles.

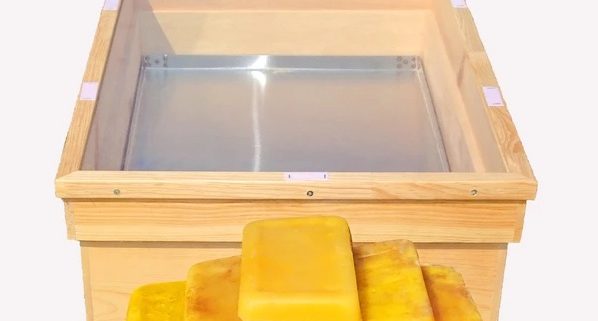
How do you transform your messy wax scrapings into usable beeswax?  Enter the solar wax melter.  The solar wax melter sounds like a high-tech piece of equipment, but is actually hardly more than a sturdy box with a glass lid.  When placed in the sun, the glass lid enables the box to heat up to the melting point of beeswax (145 degrees Fahrenheit).  The wax then neatly collects and organizes itself at the bottom of the box.  At that point, you have nice amount of quality beeswax, free of charge!

From there, it is just a simple matter of purchasing a candle mold or two.  Add some wicks and you are well on your way.

Nearly all beekeeping supply companies sell ready-made solar wax melters.  However, the design of these is so simple that it often is just as easy and economical for a beekeeper to construct their own.  For a handy beekeeper, a simple internet search will come up with more than enough plans for constructing a basic solar wax melter that works perfectly fine.

Photo of solar wax melter used with permission, courtesy of Dancing Bee Equipment.

Anticipating vs. Reacting

When we were just getting started here at Wildflower Meadows, an old-time beekeeper was retiring and eagerly sold us some of his equipment.  As we were getting ready to drive away with our truckload of beekeeping gear, and our dreams for the future, he offered us a piece of immeasurable parting advice.  He insisted that we understand that a skilled beekeeper always anticipates the upcoming, and never just reacts to what is happening in the now.  In beekeeping, he said, reacting to the present conditions is always too late.  He explained that his advice especially applied to the honey supers that we were purchasing.  He wanted us to make sure that the supers were on the hives, in place, and ready to go before the honey flow so as not to miss the action.  And then, he insisted that we should take them off right before the honey flow ends, well before the robbing starts so as to be less stressful on the bees.

Actually, his wise and priceless advice applies to almost all of beekeeping.  It is true that the best beekeepers stay ahead of the conditions, and not just react to them.  There is much to anticipate in beekeeping, and reacting is almost always too late.  For example, when a colony is in danger of overcrowding, some sort of swarm control needs to be done before it is too late.  When a queen is failing, she needs to be replaced before the hive declines precipitously.  If there are neighbors nearby with swimming pools, the bees should be given a clean and reliable water source before trouble ensues, and so on . . .

Sadly, many of the supers that we purchased from this gentleman burned up in one of the too-many-to-count California wildfires that seem to strike every year.  Yet, sometimes we still run into a few pieces of surviving equipment here and there, which always brings a smile.  More importantly, however, this beekeeper’s sage advice – far more valuable – lives on.  In our company, we take this advice to heart and always try our best to anticipate, and act, on what lies ahead.

The Queen Excluder

Most beginning beekeeping kits come with a queen excluder, and most beekeepers will want to try utilizing a queen excluder at some point during their beekeeping experience.  It is a handy piece of equipment; and as its name suggests, it keeps a queen from entering an area of the hive while allowing the smaller worker bees to pass through.

The most common use of a queen excluder is during a honey flow, when it is placed directly under a newly added honey super.  By preventing the queen from entering the area where honey is to be collected, it keeps brood out of the honey super.  By eliminating brood from the honey area, it also discourages the bees from storing pollen near the honey, which can flavor and reduce the purity of the honey.

Believe it or not, to this day generations of beekeepers still argue over whether or not to use queen excluders.  Many – perhaps most – commercial beekeepers do not use queen excluders, believing that by restricting the movement of the honeybees, the queen excluder inhibits the maximum production of honey.  Old-timer beekeepers laughingly refer to queen excluders as “honey excluders”.

At Wildflower Meadows, when it comes to using queen excluders for honey production, we take a more balanced approach.  We generally do not utilize queen excluders when we place honey supers on our colonies, as this allows the bees and the queen to move freely throughout the colony.  Sometimes, however, we do place excluders at the end of the honey flow.  If a queen has gotten too comfortable in the honey super and is still laying brood up there during the honey flow, we will drive the queen down into one of the lower boxes and then add a queen excluder after the fact to keep her from returning.  Within a few weeks, all the brood will have hatched.  Typically, the bees replace the areas where the brood has hatched with fresh nectar, resulting in a clean honey super for harvest.

Getting Bees to Draw Out Foundation

One of the more frustrating aspects of starting out as a new beekeeper is that unless you have purchased an existing hive with existing equipment, you must start your new beehive with foundation.  Foundation is sold by beekeeping supply companies and is the building block of honeycomb; but it is not in itself honeycomb.  The most unfortunate feature of foundation is that bees simply can’t use it for any purpose at all until they have added their own beeswax to it and turned it into honeycomb.  This process is called drawing out foundation.  Unless the bees draw out the foundation, the foundation itself is worthless to the beehive for either storing honey or raising brood because it simply is not deep enough.

Many beekeepers, especially new ones, struggle because they cannot seem to get their bees to draw out foundation fast enough for the hive to properly develop.  “Why aren’t my bees drawing out foundation?” is a common complaint of the new beekeeper.  It would be easy if we could just ask the bees?  But since they cannot communicate with us, we have to do some detective work.

The most important component for the bees to draw out foundation is the quality of the honey flow.  In a very strong honey flow, the bees will draw out foundation without any difficulty at all.  It is the presence of nectar that enables bees to produce the large supply of wax necessary to build out foundation with honeycomb.  But if the honey flow is less than perfect – which turns out to be about 90% of the year – the bees are going to need some additional help.  A dedicated beekeeper should always provide a generous supply of syrup to a beehive that is building out foundation.  The syrup will help to supplement the natural nectar and will turbocharge wax production.

Next to consider is the actual placement of the foundation.  Bees in a colony work from the inside out, and will always draw out the foundation that is placed towards the center of the hive first.  If you find that the bees are ignoring the outside frames in favor of those on the inside, you can try repositioning one outside frame of foundation towards the middle, and sliding the other frames towards the edge.  Be sure to keep all of the other frames in the same sequence so as not to disturb the hive and brood nest too greatly.

Also, a queen excluder may be part of the problem.  If you are trying to draw out an entire honey super of foundation, by all means you should not use a queen excluder.  Although useful for many purposes, queen excluders inhibit bees from drawing out foundation because they restrict the natural flow of bees in and out of the super.  Add the queen excluder after the foundation has been drawn out, not before.

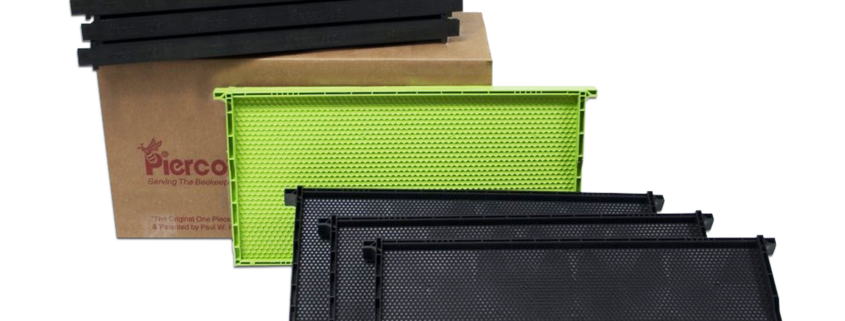
The quality of the foundation itself should not be ignored.  When working with plastic foundation, the quality of the wax coating on the foundation is critical.  The waxier the foundation, the more likely the bees will be attracted to it.  Many beekeeping supply companies sell “double waxed” and even “triple waxed” foundation.  Although this foundation sells at a premium, it is often worth the extra costs because it typically results in greater and faster acceptance by the bees.

Sometimes, however, building out foundation is just not a possibility.  For example, the season could be completely off the table.  Bees do not have any urge to expand in the late fall and winter, and are unlikely to draw out foundation at that time of year regardless of all other factors.  Or it could be that the colony simply is not strong enough to build out more than a single frame, or even a half of frame at a time.  Sometimes a beekeeper just needs to have a little bit of understanding and sympathy toward the bees!

Photo of foundation by permission of Pierco Beekeeping Equipment.

The Warré Hive

Most of the beekeepers that we work with – and the majority of beekeepers in the United States – utilize the standard type of beehive known as a Langstroth hive.  This type of hive, with removable and standardized rectangular frames, is the most well-known and well-recognized type of beehive.  It is typically the main type of hive that is featured and sold in most of the major beekeeping supply companies.

As we have mentioned in many previous posts, however, bees are flexible in their choice of home.  They can be found in the inside of tree hollows, owl boxes, the sidings of buildings, and even abandoned furniture.  Clearly, there are many types of possible configurations of beehives.  There is no universal law that says that bees have to be kept in Langstroth hives – and certainly not one honeybees themselves ever plan on following!

Back around the turn of the 20th Century, a creative and independent thinking French beekeeper named Abbé Émile Warré, gave some thought to the type of hive that he believed would be ideal for both the beekeeper and the bees themselves.  This thoughtful beekeeper considered some 350 different types of configurations, eventually settling on what he called “The People’s Hive.”  Today, we call this style of beehive a Warré Hive.  It was designed by Émile Warré to be easy to construct, economical, natural, and as comfortable as possible for the bees.

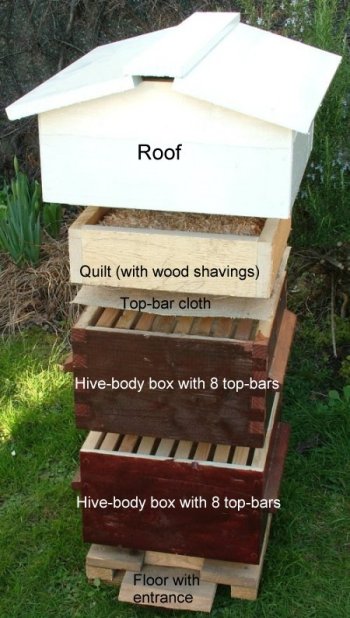
The Warré Hive is comparable to many of today’s top bar hives, but it has a number of unique and stylistic features.  The roof, like that of a well-designed human house, is gabled to allow for water runoff.  A Warré hive almost always features a ventilated loft directly under the roof.  And, add to that, it has a typically stylish entrance at the bottom.  These hives really look sharp.  The most distinctive structural feature of the Warre hive – at least in our opinion – is the quilt box that is placed directly under the roof.  Within the quilt box, the beekeeper places straw or shaved cedar chips to absorb excess moisture and provide insulation for the colony below.

Besides being a work of art for the beekeeper, the Warré hive is relatively inexpensive and easy to construct for a practical-minded beekeeper.  The materials mostly consist of inexpensive natural wood.  Since the hive itself is also a top bar hive, it does not require the purchase of enclosed frames or foundation.  The bees are free to build natural comb much in the same way that they would naturally do in the wild.  There is no plastic anywhere in or around the hive.

Unlike most conventional hives, Warré hives are designed to be worked from the top down.  This means that Warré hives are typically supered from the bottom rather than from the top.  When the first box becomes full of bees and brood the beekeeper will then add an additional box underneath, enabling the bees to expand downward.  This is a natural movement for the bees.  Eventually, when the bees have naturally expanded their brood rearing into the lower boxes, the upper box will end up remaining mostly filled with honey.  The beekeeper then harvests this top box – usually only once per year.

Émil Warré envisioned a system whereby the beekeeper would generally leave the bees alone, providing for their maximum comfort.  In his judgment, the bees did best with minimal beekeeper intrusion.  He ideally envisioned only one visit per year simply to remove the top box.  There is something to be said for this hands-off approach.  It is very respectful to the bees.  On the other hand, however, in today’s adverse environment, where bees are subject to all sorts of maladies and dangers, the bees can – and usually do – benefit from a supportive relationship with a responsible beekeeper.  To this point, the Warré design can be somewhat cumbersome for a beekeeper who wants to regularly inspect and manage their hive.

If you are interested in exploring the Warré hive further, we recommend taking a look at The Bee Space website, which features a link to Émil Warré’s famous book, “Beekeeping for All,” as well as detailed instructions on how to build your own Warré Hive.

Photo of Warré Hive used by permission, courtesy of Nick Winters; The Bee Space

Variety In Beekeeping

Most new beekeepers will quickly discover that there seem to be as many ways to keep bees as there are beekeepers that keep them!  In terms of equipment, beekeepers can choose from using Langstroth hives, top bar hives, Flow Hives, big hives, small hives, deep honey supers, small honey supers, and not to mention the various systems for making comb honey, etc.

Even beekeeping methodology differs from beekeeper to beekeeper.  Some beekeepers requeen in the spring, others requeen in the late summer or fall, and some not at all.  Some beekeepers keep Italian stock, and others prefer Russian or Carniolan stock.  The list of these kinds of variables runs deep and seems to never end.  Perhaps it is the possibility of all these options that creates some of the joy in beekeeping.  Beekeeping is a rather freewheeling affair.  In beekeeping, experimentation is the rule and not the exception!

It is the availability of all these options that creates the opportunity for learning.  Once a beekeeper gains experience in the basics of beekeeping, a whole world of learning opportunities open up. We beekeeping adventurers encourage all beekeepers to step away from the routine from time to time; try new systems, try new methods, and see where their discoveries lead them.